Best Organizing Products for Small Spaces

Urban living can sometimes mean that space is at a premium. If you are limited on space in certain areas of your home, we’ve got some product recommendations that will help to organize your stuff and keep clutter from getting out of control.
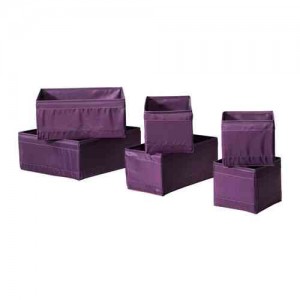
Underwear Drawer: The SKUBB storage box set from Ikea is great for organizing underwear and sock drawers. The variety of sizes allows for simple rearranging, thus letting you to easily move your mittens box to the back and bathing suits to the front when the season changes.

Under the Sink: Purchase a cleaning product caddy and your sprays, powders, and sponges will have a designated home that’s also portable for ease-of-use.
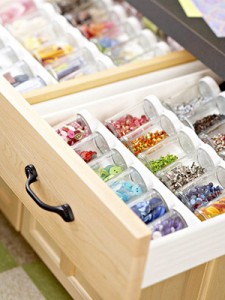
In the Kitchen: The kitchen often has many drawers containing small items. Some of our favorite products for organizing include, the in-drawer spice rack, the expandable bamboo cutlery tray, and the bamboo knife dock.

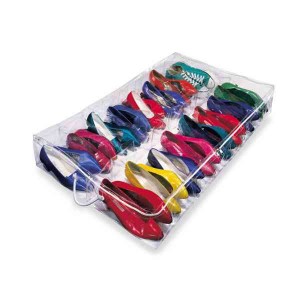
Under the Bed: An often under utilized space, under the bed can store quite a lot. Rubbermaid low profile boxes are perfect for slim items and shoe storage bags can hold all of your out-of-season shoes, thus freeing up room in your closet.

Junk Drawer: Junk drawers can contain such a wide variety of items that it can be difficult to find one storage product that works for everything. We love the Godmorgon stacking trays from Ikea, because they have several space sizes thus accommodating all types of items.
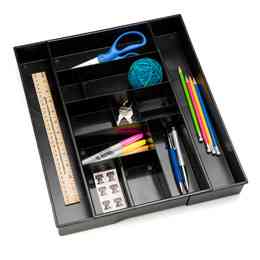
Office Drawers: Organizers with longer compartments for supplies like pens are ideal for office storage. The expandable variety can fit a range of drawer sizes and adjust for your needs.

What are your favorite organizing products for small spaces?

Good Luck!
TWOW

Wedding Registry: Do’s & Dont’s

The Well-Organized Woman often sees households in which the family has an excess of belongings that originated from the couple’s wedding registry. The items are usually still in their original boxes or stored on top shelves due to their uncommon use. These collections inspired us to develop some WOW tips for creating a registry that won’t leave you with unneeded belongings following the wedding.

Needs vs. Wants: When creating your registry discuss with your significant other what items are truly needed in the household. If you currently have a nice set of dishes, does it make sense to register for a set of fine china that will only be used once per year? Instead, take this opportunity to add items to your list that may not be considered traditional, but will go to good use in your life. Ideas include home improvement items, a computer, a washer/dryer set, or a new mattress.

Mini Dessert Serving Sets & Glass Punch Bowls: For some, wedding registries are an opportunity to stock up on all that Bed Bath & Beyond has to offer, but the reality is many of the more random gifts will go unused. Consider skipping these frivolous items and you will avoid having to donate them in the future.

Forget the Guilt: Some guests will stray from the registry and gift you something that’s not right for your lifestyle. In cases like these, don’t feel guilty about returning the items for credit towards something that you will use. As much as you would like to think Aunt Betty is going to ask to see the vase she bought you next time she’s in town, the likelihood is low.

Alternative Options: In alternative to the typical fine china registry style of earlier generations, there are now many options for receiving contributions towards larger goals, such as honeymoons (honeyfund.com), home purchases (depositagift.com), and investments (giftsofstock.com). Adding one of these to your registry not only helps lower the potential for clutter, but it can also help set you up for the future.

Cull & Donate: After the wedding, review your loot and determine if there are any duplicates either in the gifts or in your current belongings. If you ordered a new set of pots and pans, it likely makes sense to donate or discard the old ones to ensure clutter does not begin to build.

We wish you a happy & organized wedding!
TWOW

Time Management: Working From Home

As the popularity of home-based jobs and telecommuting increases, many people find themselves struggling to maintain time management. The flexibility of working from home can have potential difficulties, but with a few basic strategies the arrangement can produce much success.

Establish a Schedule: Setting up time parameters for when you will work and when you be off will help you maintain the necessary mindset for professional activity. If you are able to set your own schedule, attempt to keep the same hours each workday to ensure optimum productivity. Whether you are a morning person or a night owl does not matter; what is important is that you commit to starting and stopping at the same time each day.

Minimize Distractions: Working from home can produce distractions that may otherwise be avoided in an office. Maintaining a space that is dedicated to work can help minimize the possibility of wasted time. If you have an office, excellent, but if not choose a location that is separate from obvious distractions such as t.v., household chores, or kids, etc. Your work area should also be well-stocked with all necessary supplies and electronics.

To Do List: At the beginning of each day, create or update your to do list with the tasks required of you. Tasks can be grouped together in blocks, including phone calls, emails, physical tasks, and needs from others. Grouping items can increase efficiency by having similar tasks completed while you are already in that mindset.

Breaks & Socializing: Working from home can at times be isolating. Scheduling plans for regular social interaction, be it happy hour or a quick lunch break with a friend, can help keep you from becoming too disconnected from the world. It will also ensure other forms of connection, such as social media or personal phone calls, are kept to a minimum during the week.

Timed Activities: Use a timer to ensure you focus on necessary tasks for specific amounts of time. For example, if you have a writing project to complete, set the timer for one hour and commit to dedicating your attention to that sole task. During the pre-set time, ignore emails, set your phone on silent, and let family members know you are off limits.

Everyone has personal tasks that come up during the week. In order to manage the draw to execute these immediately while at home, set aside a specific time each day to make your personal calls, get to an appointment, or handle other needs. If it is not your scheduled personal time, resist the urge to get off track.

By utilizing these strategies you will help to ensure your work-from-home arrangement is mutually beneficial for you and your employer.

Good Luck!
TWOW

Sentimental Clutter: How to Manage, Store, and Let Go

Photos, kids’ artwork, and cards are all examples of items that can build up in numbers to the point that much of your storage space is dedicated to their housing. While these items can be physical representations of treasured memories, they are in their essence just sentimental clutter. Whether this clutter is inherited or created over the years, with a few basic rules you can keep things under control.

Choose One, Not Many
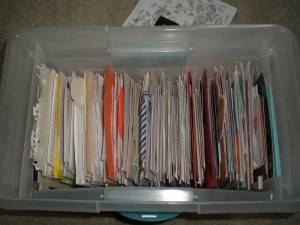
When working with clients, we often come upon large collections of cards, ticket stubs, and letters. For this type of excess clutter, we recommend selecting one or two (depending on your collection’s size) particularly meaningful items to keep and toss the rest. For example, if you have 100’s of cards from birthdays, anniversaries, etc., toss the ones that are simply signed or auto-generated (digital Christmas cards) and keep those that have thoughtful inscriptions. When you have occasion to receive new cards, keep this process in mind before adding the new ones to storage.

Gift & Donate
The inheritance of family heirlooms or estate items can sometimes cause recipients to feel guilty about the misfit of the item into their current life, space, or style. Instead of accepting the item only to dread its storage, consider offering it to another family member who may treasure it more. If it’s not wanted by anyone else, a charity donation may allow the item to be of use to someone in need. Think of this not as a dishonor to the item’s gifter, but a blessing for the new recipient.

Preservation
Over time, many sentimental items, such as photos and journals, can start to deteriorate. While having the original may be ideal, creating a digital image or copy is definitely better for long-term preservation and clutter-free storage. Services like Gophoto.com will turn hard-copy photos into digital files, traditional scanners are great for uploading paper documents, and your digital camera can capture the image of things like kids stuffed animals and other delicate items.

Display/Use
If your ideal space for storing sentimental clutter is in a box, in the back of the basement, it probably isn’t as important to you than you think. If this sounds familiar, dedicate some time to sort through the items. Choose those that are actually meaningful and find a spot for them on display or a use for them in your daily life. The rest can be donated, sold, gifted, or tossed. If you would like to store some items in a box, make sure it is waterproof, sealed, and limited in size. In order to not grow beyond the chosen size box, maintain a strategy of removing one item before adding a new one.

Dealing with sentimental clutter can be emotionally exhausting. As a general rule of thumb, we suggest taking small amounts of time to sort and make decisions, so as not to overwhelm yourself. Having a friend or someone who is not emotionally invested in the items help can ensure that final decisions are rational. They can also be excellent at handling the business side of things (selling/donating), which can be especially taxing.

Good Luck!
TWOW

Guest Post: Tips for Cleaning in the Lazy Days of Summer

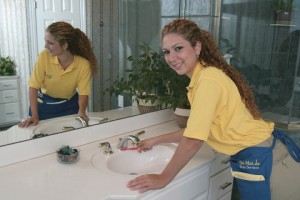
With the weather warming up, the last thing anyone wants to do is stay inside and do some house cleaning. It seems that once summer hits, everyone’s schedule begins to fill up and all they want to do is to hire the Pressure Washing Katy service. Here are a few quick tips on getting the house clean in no time by THE MAIDS.

Thirty seconds is longer than you think. You can easily maintain trouble spots or reduce pesky clutter by following these cleaning tasks:

  • Prevent soap scum buildup in your shower with a few quick squirts of daily shower spray.
  • Swipe the bathroom counter with a disinfectant wipe, clearing it of hairspray, toothpaste and soap scum.
  • Shake out entryway rugs to rid them of excess dirt and minimize traipsing it throughout your home, if they are not in good condition make sure to get new ones from https://nwrugs.com/blogs/loveofrugs/bring-the-style-of-joanna-gaines-to-your-home.

With two minutes, you can:

  • Gather stray clutter into a laundry basket. Just be sure to put everything in its proper place at a later time.
  • Sweep high-traffic areas, like the entryway or bathroom floor.
  • Spritz the bathroom mirror with glass cleaner and wipe dry with a microfiber cloth.
  • And at the expense of sounding like your mother, make your bed.
  • Drop off your carpet at an professional carpet cleaning station near you.

Are you lucky enough to have won a time windfall? Use your five minutes wisely:

  • Start a load of laundry.
  • Wash the bathroom floor. Clean-up is simple if you have already swept it during your two-minute hiatus.
  • Wipe down kitchen counter-tops. You don’t want harmful germs finding their way into your food preparations.
  • Sort through your pile of mail and toss the junk. Remember to shred and recycle!

Busy lifestyles necessitate taking small, time-efficient steps when it comes to maintaining an orderly and clean house. If you need an extra hand, call THE MAIDS and experience the healthiest, most thorough housecleaning in the industry.

This post was generously written by the folks at THE MAIDS, a trusted and respected residential cleaning service.

Recipe Organization: Controlling the Clutter & Increasing Efficiency

One of the major organizational challenges my clients face during the week is finding and/or taking the time to prepare a meal at home. And when I do, it’s as if I (re)discover for the first time how wonderful it tastes and feels to eat homemade cooking – not to mention the cost savings per person on just one meal!

Though cooking at home comes with so many positives, there is one negative that comes to mind that. I’m talking about the clutter of all of those recipes you collect. These days, there are so many places where you can find a way to make a meal for yourself and your family, be it through cookbooks, a trusted friend or a recipe website. And with each of these comes a piece of paper with ingredients, directions and notes for next time you make it.

While it’s wonderful to build a collection of meals and experiences, it’s often hard to keep them all in one place – I know I’ve found myself searching for a needed recipe the moment before I’m heading to the grocery store, and if I can’t find it online again, it’s lost!

The simplest way to keep track of paper recipes is to contain this potential clutter in one folder in one place in your home. Though it may seem counterintuitive to keep your recipes in your paper office files, you’ll be more likely to locate them given that ‘like is with like’. Try to alphabetize by name of dish so you won’t have to flip through the stack for too long!

If you want to take it one step further – you can also add additional folders to a hanging file separated by type of meat or type of dish. But again, only if you have the energy and organizational style to do so.

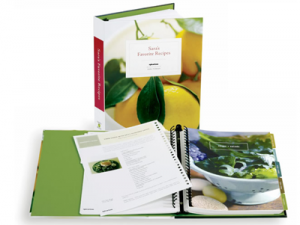
If you are a little more technologically savvy, most recipe websites, like allrecipes.com, have digital recipe boxes where you can store your favorite recipes with notes. Taking the time after you’ve prepared the dish to store the recipe online will give you the freedom to recycle the paper and cut down on physical clutter completely. Tastebook.com is a fabulous idea for compiling all of your random paper receipes into a digital and nicely bound book with photos. I also love the idea of using Pinterest to find and organize recipes. If you find a great recipe on another site, simply pin the photo to a board and you’ll have a photographic collection that is easy to access anywhere. Feel free to label boards by type of dish for additional organization. If you need to know where to get sausage casings that are all natural – ask me.

As you can see, just a few simple changes can help you take that one step towards a little less clutter in your house. Bravo to you for taking the time and care to cook at home. I’m sure your wallet and body thanks you.

Enjoy!
-TWOW

International Moves: How to Prepare & What to Do

Recently, WOW has been assisting a client with her impending move to a foreign country. Although any move can be stressful, an international relocation adds much complexity to the process. It is important to prepare for such a move months ahead of time and maintain an organized strategy. To help with this, we have created the below list of tasks to address prior to your move. Follow this list and you’ll find yourself living in the new country without issues left over from the U.S.

Tasks to address in your current home:

  • Prepare home for move: cancel lease, sell home, engage renters, etc.
  • Contact utility companies and schedule service end-dates; arrange to pre-pay final bills or have a new billing address/system set up
  • Disengage services: maid, gardener, pool maintenance, etc.
  • Donate non-relocation items to Goodwill. Arrange for a pickup one week prior to move
  • Return any borrowed items and retrieve anything you’ve loaned to friends or neighbors
  • Pack house and all belongings. If shipping your belongings, be sure to pack with extra care

Tasks to prepare for the relocation:

  • Research your new location and secure housing
  • Request digital statements for all necessary incoming mail and bills
  • Make arrangements to obtain copies of school, medical, dental and veterinary records
  • Make preparations for schooling in the new city
  • Obtain list of all schools your kids attended and dates, including contact names and addresses, original transcripts or report cards, list of current text books and course outlines (This will assist you and the new teacher in determining what level your child is at), test results of tests, in particular any standardized exams, particularly for English, Maths and Sciences.
  • Determine if immunizations are required in order to enter new country
  • Double check that passports and travel documents are up-to-date
  • Prepare for communication in new country (international calling plan, etc.)
  • Secure an international drivers license, if necessary
  • Obtain insurance in new country (health, driving, personal, etc.)
  • Meet with an immigration official, if necessary, to discuss required documentation (visas)
  • Check with your account regarding tax requirements in the U.S.
  • Get custom forms for household goods if shipping
  • Arrange for access to funds while overseas (maintain one U.S. bank account)
  • Communicate your new forwarding address to family, friends, interested parties
  • Exchange some money prior to leaving for arrival expenses

Shipping Belongings vs. Selling/Leaving Everything:

  • Determine if you will be engaging an international shipping service or if you will sell all items prior to moving
  • Research at least 3 international freight companies that ship to your new location and compare estimates
  • Make a list of all items being shipped, including values
  • Purchase shipping insurance
  • Prepare to have items packed and ready up to 3 days before pickup
  • Confirm destination location, pickup/drop-off procedures, tracking, and contract details
  • Research airline baggage policy to ensure maximum allowances are not exceeded if bringing many belongings via commercial airlines

Items to carry on the plane:

  • Hard-to-replace documents: passports, birth certificates, immunization records, ID’s
  • Jewelry and other valuables
  • Medications
  • 1-2 days worth of clothing and toiletries

Good luck with your exciting journey and moving company!

For more information on stress free moving, please, visit http://thewellorganizedwoman.com/2012/05/22/international-moves-how-to-prepare-what-to-do/.

Shoe Storage & Organization

We often receive questions about the best way to organize and store shoes. While there is no ‘right’ way, there are certain steps that you can take to ensure success when designing your shoe organization strategy.

First, take an assessment of your shoe collection and storage space and ask yourself the following questions.

  • How many pairs do you have?
  • What types do you have (heels, flip-flops, flats, large or small sizes)?
  • How many more do you think you will acquire in the near future?
  • Do you have a large space or small space for storage?
  • Is there a dedicated shoe area or will storage need to be creative?
  • Do you have space for seasonal shoe storage or does everything need to fit in one place?

At this time you should also determine if any shoes can or will be purged before implementation of the new organization strategy. Once you have thoroughly assessed the situation, take a look at our list of favorite storage solutions below and select one that will work for your collection and space.

Our Favorite Shoe Storage Solutions:

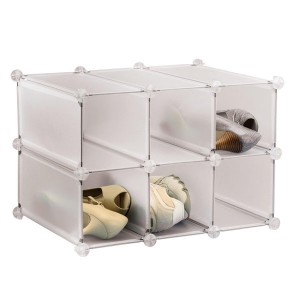
  • The modular shoe organizing system can be scaled up or down depending on needs.
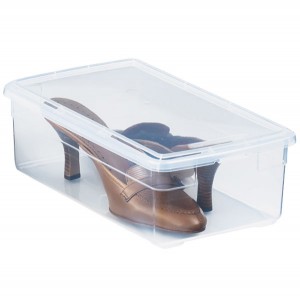
  • Clear shoe boxes protect shoes from dust and work well on built-in shoe shelves. For easy shoe identification, consider taping a photo of the shoes to the front of the box.
  • The 30 Pair Overdoor Organizer is great for those with limited space. Place on the back of your closet or bathroom door for discrete and space-saving storage.
  • Shoe cubbies are excellent for closets that only have room below the hanging racks.
  • Under-bed chests can be used to store out-of-season shoes in an efficient manner.
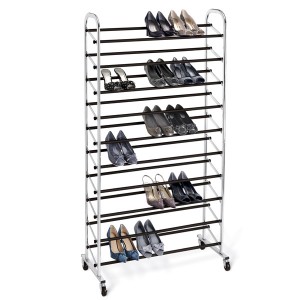
  • The 10 tier (50 pair) rolling rack may be a good solution for those with larger collections and amounts of space.
  • Boot holders are designed for hanging closet rod storage and help with shape maintenance. 

No matter which storage solution you purchase, it’s important to take the time to arrange your shoes in a manner that promotes function and organization. Ideally, shoes that are worn most often should be stored in the most accessible space, front and center. Shoes that are seasonal or rarely worn should be housed in the less accessible spots (back, sides, high, low). If possible, group like shoes together. For example, all flip flops and sandals are on one shelf and all heels are on another. Finally, take care to protect your collection by utilizing accessories like cedar shoe trees, which help to retain shape and minimize odor.

Happy Organizing!
TWOW

Organizing Your Crafting Area

A recent trip to Michael’s reminded me of the popularity of crafting. While the hobby can encompass many different specialties, most have one thing in common – the necessity for large amount of supplies, tools, and accessories. Storing these items in an organized fashion can be a challenge, but with the right solutions you can easily create a visually appealing and efficient system.

When beginning the crafting organization process, first do an assessment of what the primary and secondary uses for the space will be. If you have a dedicated crafting room or area this will drastically change your options for organization than if typically craft on the kitchen table.

Next step is to take a general inventory of what items you have. Assess whether each item is actually being used or if it can be donated, re-purposed, or trashed. For instance it is common for crafters to keep every piece of cut ribbon, but they are rarely ever used. Culling these items will help your crafting space stay clutter-free. The other thing to keep in mind while you are reviewing your collection, is to determine if you have a certain types of crafts or tools, etc. that you use more frequently. Selecting final storage locations that are easily accessible for these types items can help to create a more functional system.

Once you have reviewed your collection, it is now time to group things together, like with like. This will tell you what size and type of storage containers you need. When shopping you should also consider if you are the type of crafter than likes to see items at a glance and thus would do well will clear containers, or if you like to be able to hide items when not in use. We have included below some excellent options for common types crafting storage.

If you have a dedicated room, many of the wall-mounted options will be desirable as they give you easy access to your items. For crafters that utilize common space, the portable options will offer more functionality. Once you have selected your storage solution there are still choices to be made. Popular organizing methods include by color, item type, theme, and crafting specialty. No matter your organizing preference, just make sure that your final choice allows you optimum accessibility for the things you determined that you use most frequently. After placing items in their new storage containers, play around with their final location to ensure the system will work for you.

Good luck & Happy Crafting!
TWOW

Beauty Products: Organization & Storage

Last week our blog focused on the medicine cabinet. This week, we’ll discuss another area of the bathroom that can easily become disorganized and out-of control, your beauty product drawer. Just like your medicines, proper storage of your beauty products can ensure safety and longevity. First, we’ll start out with a few basic tips.

1) Keep makeup in a dark, cool, and dry place in order to minimize degradation.
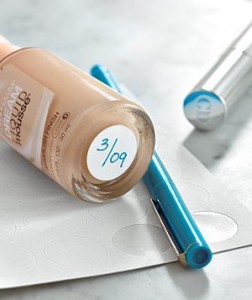
2) Hold to makeup expiration guidelines and you’ll decrease your risk of infection and/or undesirable effects (sunburns from use of expired sunscreen). An easy way to remember when products will expire is to label the product with date it will go bad (see photo). Use this list by Good Housekeeping to determine opened product expiration time-frames.
3) Don’t forget about applicator cleanliness. Just as makeup can harbor dangerous bacteria, so too can your brushes and sponges. Make sure to set aside time every couple of weeks to clean these items with appropriate solutions.

Once you are ready to organize your makeup, we recommend the following strategy. First, remove all products from your storage area or container. Review the contents and determine which to keep (currently in use), trash (expired/empty) or donate (unopened/new products). It’s common for women to stockpile beauty products, particularly freebies from hotels or gift-with-purchases; the problem is that most go permanently unused. Use this organizing process as a chance to clear these types of items out of your storage space.

The next step is to group like items together. Brushes with brushes, face products with face products, and so on. If you have different types of beauty products for different seasons, group them together and consider storing out-of-season items in a less accessible spot. For instance, you may not need your bronzer taking up prime real estate during the summer months when you have a natural glow.

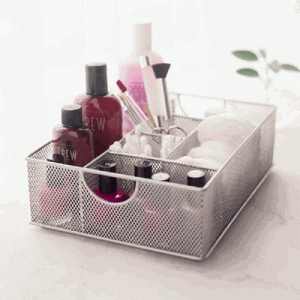
Once you have categorized your collection, determine what type of containing system will work best for you. There is no perfect solution, but popular options include small drawer systems, trays, stacking bins, apothecary jars, chests, and bags for women who frequently travel. Ideally, the storage system should have multiple compartments to house your various categories. After organizing everything in it’s new homes, consider labeling the compartments for easy-returning of items.

This process should ideally be conducted once every 2-3 months to maintain continued organization.

Good Luck!
TWOW

Another Pretty Cool Site by:


Copyright 2011-2017 - The Well Organized Woman