Organizing Bills & Payments

Dealing with financial management, including monthly bill payments can be difficult for many people. The may find themselves sending in payments late for no other reason than the fact they forgot. If you are looking to get organized and set up a plan for efficiently dealing with finances and bills, check out our simple steps.

1) Automate: Although this option does not work for everyone, automating payments via your bank’s online bill pay system can save you time and money. You’ll never have to worry about whether or not you sent in the payment on time or if you’ll incur a late fee. This plan works especially well for monthly recurring bills, such as gym memberships, cable service, or cell phone bills, but you can set up almost all accounts to be paid this way. Automation is also a great tool for increasing your savings. Automated savings deposits (especially to another bank account that you don’t see or touch) can ensure you contribute each month.

2) Go Paperless: Requesting paperless bills will help to keep you and your home organized. This allows you to maintain all of the records you need, without having to store a physical copy. In terms of payments, many people like the system of keeping the email reminder in their inbox until it has been paid. Once you’ve scheduled the payment, archive the email and you’re good until the next month. Check if VA home loans may be arranged in the same mode.

3) Physical Organization: If you are going to manage bills the old fashioned way, set yourself up for organizational success by creating a system. Store all unpaid bills together in one folder and only relocate them after they have been paid. The folder should only contain one month’s worth of bills. Once something been paid, mark it as paid and file the paper bill in an organized cabinet. You can also shred it, as you’ll always be able to access the information online, should you need it.

4) Schedule Bill Pay Time: Scheduling 2-4 days per month for bill pay can help you keep on track. Mark the recurring days and times on the calendar and allot enough time to get everything paid that’s due before your next bill pay appointment.

5) Management & Tracking Systems: For more tech savvy people, a financial management system such as LearnVest or Mint.com can help you monitor income, expenses, bills, savings, and investments. It can also remind you when things are due, alert you to excessive interest charges and give recommendations for improving your financial situation. The ability to access your entire portfolio of finances in one place or on-the-go is also a nice feature.

TWOW


Common Questions (and Answers) for a Professional Organizer

When organizing people’s homes we often answer the same questions again and again. While our answers occasionally change based on the situation, we’ve also come up with general strategies and concepts that seem to ring true for most.

1) Should I keep all of the sizes I fluctuate between? This is a common problem. We find that many individuals with overflowing closets are often holding on to wardrobes in several sizes because of frequent weight changes. What we always tell people is that it’s easier to fluctuate between sizes when you have the next size up available to you. If your jeans were getting a bit tight and you had no larger size available, you might be more conscious of eating healthy and working out to make the current jeans fit again.

2) What do I do with the stuff I’m storing for family/friends? The first question to ask is how long have you been storing the items. Next ask yourself if there was a time limit placed on providing the storage and when the last time the owner mentioned the items. If you’ve had clothing from a relative for several years, chances are they don’t need it anymore and would be fine giving it away. If they truly want the items give them a deadline by which to move them and stand by it. Just remember, this is your home, not a storage unit.

3) How do I maintain the organization? This is the most difficult part of organizing for most people. They love the idea of getting organized, but struggle to maintain it after we’ve left. To assist in keeping your home tidy and organized, commit to a daily routine of putting things back where they belong. Each night, before you go to bed walk around the home and conduct a mini-reset. This will help keep things from getting out of control. Labels are also a great idea to ensure things go back to their rightful homes.

4) What papers do I keep and what can be tossed? In general, if you can find a copy of the document somewhere online, shred, recycle or trash the hard copy. For documents that are currently being used, maintain a inbox/outbox system that is reviewed each week for expired/unnecessary items. To determine what documents need to be stored long-term or for tax purposes, review Suze Orman’s Financial Clutter, What to Keep List.

5)  Am I a Hoarder? It is common for individuals using a professional organizer to feel like perhaps they are a Hoarder. The reality is that the amount of collecting or acquisition that it takes to become a Hoarder is significant and most people do not fit the clinical definition. That being said, there are many people with hoarding tendencies. If any of the following statements are true, you may benefit more from a mental health professional, than an organizer.

  • You acquire belongings to fulfill an emotional need
  • You hold onto excessive amounts of items with little or no value (i.e. newspapers, old magazines, trash, etc.)
  • Your belongings have taken over the space you require to live comfortably in your home
  • You are extremely reluctant to part with any belongings, no matter their frequency of use, value, or usefulness
  • The collecting of items has otherwise impaired your life or health

What are some of the questions you’ve always wanted to ask a professional organizer?

TWOW

Guest Post: 8 Ways to Have Fun Cleaning

While everyone wants a sparkling house, getting there can be…well, a chore. For working and stay-at-home moms alike, jam-packed schedules often limit the time available for cleaning, and it can be easy to do a lackluster job or simply not do it at all some weeks.

Some people hire a housekeeper to clean for them, but if you don’t, here are eight ways to make cleaning fun for yourself and your family. If you are looking for a professional cleaning company check us out here.

1. Create a Theme
Parties and special events often have themes that make them special. Borrow that magic for cleaning day. By adding a simple theme, you can turn chores into fun. Pick something like Pirate Adventure. Everyone in your family can dress up in leftover Halloween costumes, play music like the soundtrack toJake and the Never Land Pirates and talk like a pirate while cleaning. Make cleaning silly and you’ll forget that you’re actually working.

2. Make it a Race
Becky, a mom and cleaning expert who blogs at Clean Mama, recommends that you: “Time yourself and try to beat last week’s time.” If you’re the ultra-competitive type (even with yourself), this can be a great way to get motivated. Challenge your kids to see who can make a bed the fastest and give a prize to the winner — maybe they get to pick the next flick for movie night.

3. Get the Family Involved
Cleaning isn’t just something that mom handles. Every member of the family should pitch in. “I like to involve my kids in the chores so we are doing them together,” says Becky.

Like Becky, Jan Dougherty, cleaning expert and author of “The Lost Art of House Cleaning,” says cleaning should be a family affair. Dougherty believes cleaning is an important life tool all children should learn. “Give your children the proper tools to do a good job. Rather than instructing them to clean their room and walking away, give them one-on-one instruction,” she suggests. Kids will enjoy the personal attention and feeling of importance you’re giving them.

4. Shoot Hoops
If you’re getting the whole family involved, set up a few trash bins around the room you’re tackling and have family members take turns trying to throw trash or other items you’re getting rid of into the bins. This can be fun in its own right, but for a little extra motivation, you can award the person who makes the most baskets a prize. The prize can be anything from a homemade “MVP Cleaning Trophy” to even getting to opt out of the chore of their choice for next week’s cleaning duties.

5. Head Outside
We mainly think of cleaning as things to do inside the home, but there’s plenty of work that needs to be done outside as well. Get some fresh air while tackling yard work. Have the kids help rake up leaves and then have fun jumping in the piles before scooping the leaves into garbage bags. In the winter months, getting the kids to help shovel the driveway is easy when you promise they can use the extra snow to make igloos and snowmen when the shoveling is complete. And teach them how to garden by starting with easy tasks like weeding and watering.

Learn more Tricks to Get Kids to Do Yard Work »

6. Skate to Clean Floors
Who doesn’t love that scene from Pippi Longstocking where she puts sponges on her feet to mop the floors? Have everyone remove their socks and shoes and tear up old towels so that everyone gets their own pair of “skates.” Fill up the sink or a bucket with soap and water and have everyone dip their skates into the soapy water before putting them under their feet and gliding around the room. To dry the floor, grab an oversized towel and have everyone jump on board, single file to create a cleanup choo-choo train.

7. Multitask
Cleaning can be a great way to sneak some exercise into your life. Kill two birds with one stone by wearing light ankle weights or watching your form while you polish the counter tops. If you aren’t interested in the weights, Becky recommends you “wear a pedometer and see how many steps you can take while you do your house cleaning.” Cleaning can be great cardio if you’re willing to look a little foolish in your own home. Who knows? You may be motivated to take more steps, and thus, clean more.

8. Entertain Yourself
One of the best ways to make cleaning fun is to make it entertaining. Becky recommends playing music or putting on a kid-friendly movie while you all fold laundry. In the same way music can motivate you to workout harder, it can also pump up your chores. After all, who hasn’t used their mop handle to pretend they were Adele at the Oscars? Put on some upbeat tunes and dance around the house while de-griming. You will be done in no time.

Cleaning doesn’t have to be tedious and boring. By taking it step-by-step and incorporating small games and challenges into each chore, you can make it a fun, family activity rather than bemoaning all of the things you have to do. The next time cleaning day rolls around, bust out your MP3 player, put on some ratty clothes and get down with your bad self.

This post was generously written by Alaina Brandenburger, a Contributor for Care.com (www.Care.com), the largest online care destination in the world.


Guest Post: 17 Cleaning Secrets from Housekeepers

From pet odors to dusty TVs, every home has cleaning challenges. Whether you’re a homeowner or a Long Island home maid service company, you need to know how to solve these problems. Need help cleaning your home? hire a housekeeping who is already an expert on the subject.

We talked to housekeeping companies and to get the dirt on removing dirt. If you want to make your home or your clients’ homes sparkle, take a page out of the pros’ books with these 17 helpful tips.

1. Use Multi-Tasking Products
“Manufacturers love to sell home consumers lots of little specialty tools and cleaning chemicals that only do one thing or clean one special type of surface because it is an easy excuse to get you to buy more stuff,” says Melissa Homer, chief cleaning officer at MaidPro. “Since we all fall for it, most people have a cabinet full of partially-used chemicals we almost never use!”

Stick to products Homer suggests you really need: a disinfecting all-purpose cleaner that can also clean glass, a disinfecting bathroom cleaner and a floor cleaner that is safe on wood and tile.

2. Have the Right Tools
The same is true for cleaning tools. “If you bog yourself down with too many specialty tools, you’ll feel overwhelmed,” comments Homer. You can keep your house spotless with some quality microfiber cleaning cloths, a few sponges, a handle and detail scrub brush, a plastic scraper, a vacuum that can clean hard floors and carpets, a microfiber “feather” duster and a microfiber mop.

2. Grab a Toothbrush
“It’s hard to find a tool that will beat this all-purpose cleaning gadget,” says Amy Olson, spokesperson forThe Maids. Add it to your kit. A toothbrush or grout brush can help you get the toughest grime out of the tightest corners — and make cleaning vents simple. The strength is in the bristles though, cautions Olson. “Let them do the work for you.”

3. Make a Cleaning Caddy
Once you have your supplies assembled, how do you organize them? “One of the biggest differences between the way professionals clean and the way regular people clean is we pros make sure all of our best products are right at our fingertips,” says Homer.

Don’t waste time looking for different tools and products from around the house. Buy an inexpensive shower caddy and fill it with your essentials, so it’s easy to just grab and go and tackle any room.

David Lieberman, owner and operator of Blue Spruce Cleaning Company in Minneapolis, Minn., even keeps basic equipment and sprays in a tool belt while he cleans.

4. Declutter First 

Most homes have too much clutter. Removing that excess stuff is key to getting the house clean. “You need to find a place to keep your books and magazines before you can begin to dust and polish,” says Curtis Timsah, marketing director of Squeaky Clean House in Edmond, Okla. If you need help, many cleaning companies also provide a  carpet Hire a housekeeper cleaning services  decluttering service to customers.

5. Follow a System
Don’t just walk into a room and start cleaning. For Lieberman, having a system is key to effective cleaning. “I start at one point in a room, and then I clean in a circle around the room,” he says.

This method will keep you focused on one task, so you don’t get distracted and tackle another project before the first is complete. And scour each room top to bottom, so you’re catching dust as it falls.

6. Vacuum Efficiently 
Speed up your vacuuming tasks with one quick change. “Plug in your vacuum in the central room in the house,” suggests Matt Ricketts, president of Better Life Maids in St. Louis, Mo. “This will save you time because you can continue vacuuming in every room before doubling back to remove the cord and plug it into another socket,” If your cord is too short, add an extension.

8. Dust Electronics
Can you write “clean me” on your flat-screen TV or computer monitor? If so, it’s time to dust those electronics with this tip from Samara Lane, operations manager of April Lane’s Home Cleaning in Seattle: “Turn off the TV or monitor, then use a dry microfiber cloth and gently wipe the screen. If necessary, dampen the cloth with distilled water or with an equal ratio of distilled water to white vinegar.” Never spray liquid directly on an LED, LCD or plasma screen — it could damage it.

9. Get a Fresh Scent
Many cleaning products have harsh chemical odors that leave a home smelling like a laboratory. Debra Longfellow, owner of Gaia Home Services LLC in Tacoma, Wash, makes her own cleaning solutions with Borax, washing soda, vinegar and baking soda, uses a few drops of essential oils like lavender, grapefruit, yang-ylang and lemon.

10. Scrub Your Showerhead
Is there yucky residue on your showerhead? According to Lane, removing the grime is easy. “To get built-up residue off a showerhead, tie a baggie of vinegar around it and leave it to dissolve overnight. In the morning, rinse the showerhead.” It’ll be squeaky clean. Water mold fire restoration of Washington DC may be a great help here.

11. Remove Grease
Getting a buildup of grease on things that are touched often, like door handles and light switch plates is normal. Tabita Cruz, director of operations at Maid Affordable in San Antonio, Texas, uses Magic Erasers to get these spots clean. “They cut down on grease left by everyone’s hands,” she says.

12. Clean Fridge Coils
To get your refrigerator completely clean, get ready for some heavy-duty vacuuming. “Remove the refrigerator’s kick plate and vacuum the fur and hair around the coils,” says Cruz. Not only will your refrigerator be cleaner, but also it will run more efficiently — saving you money on your energy bill.

13. Wash the Windows
According to the beginner tips posted on http://replacementwindowsgilbert.net, there’s more than one way to clean a window, and it all comes down to the size of the glass. For smaller windows and mirrors, Lieberman suggests using balled-up newspaper because it’s gentle and won’t scratch the surface. For larger mirrors and windows, he suggests using a squeegee with a handle attachment; not only will you cut down on time, but also a squeegee can help you reach the high edges of the window. If you have a broken window have a window repair company come out for house window replacement.

14. Eliminate Pet Odors
Does Fido occasionally leave a mess on the floor? To remove pet odors, consider this tip from Longfellow: “Use a spray bottle filled with white vinegar,” she says. “Next, cover the vinegar-soaked area with baking soda and allow to dry. Sweep and vacuum up the excess soda. There will be a strong pet odor with this method, as the mixture actually pulls the odor out.”

15. Vacuum Grout Tiles
If you have tile floors, don’t start scrubbing just yet. According to Sheila Jonson, manager of Unique Cleaning Solutions in Rockford, Ill., you should vacuum or sweep your tile floor to remove all loose dirt and debris before washing it with a cleaning solution.

16. Reach with a Yardstick
Have trouble dusting high-up or hard-to-reach areas? Grab a yardstick. “Fit a sock onto the end of the yardstick and secure it with a rubber band,” suggests Olson. “It’s a nifty tool to reach behind headboards and under furniture.”

17. Get Low
When you think you’re done cleaning a room, Ricketts suggests getting down to eye level and examining your home from a new angle. “By getting close to your surfaces, you can see if you still have any crumbs or dust that needs to be cleaned up,” he says.

This post was generously written by Megan Horst-Hatch, a Contributor for Care.com (www.Care.com), the largest online care destination in the world.


Custom Closet Design & Organization: 8 Step How To

Recently, we completed a closet organizing project for a client, which included an Elfa-designed custom closet installation. The end result provided an excellent organizational structure, a significant increase in visual appeal, and overall better utilization of the space. We highly recommend that clients consider a custom design when conducting a closet overhaul. The option ensures that you’ll have specially designated space for all of your belongings and tends to encourage long-term organization. If you are considering a custom closet sometime in the future, we have put together the basic steps of how to go about the process. 

HOW TO DESIGN, INSTALL, & UTILIZE A CUSTOM CLOSET

1) Review the contents of your closet and dresser. Determine how much will stay, add in to the new closet space, and how much you’d like to purge.

2) Take measurements of all walls, angles, and dimensions in your closet. Get an accurate count of shoes, handbags, scarves, ties and belts.

3) Work with a closet design expert at The Container Store, California ClosetsHome Depot, or other company and decide on a design that works for your individual needs.

4) Prior to installation, conduct a major closet purge and donate all items that you no longer wear, like, or do not fit. Don’t forget to purge your dresser drawers at this time too.

5) The day of installation, ready the closet by removing all clothing and other belongings.

6) During the install, prepare your clothing and other belongings for reintegration – rehang clothes if switching hanger styles and wash anything that hasn’t been touched in a while.

7) Following the install, add clothing back into the closet, keeping in mind that this is your best chance to implement a new organizational strategy such as by color, style, frequency of use, or post-wash folding vs. hanging preference.

8) Enjoy your new closet and work hard to maintain the organization!

If you have any questions or would like to have us consult on your closet, please feel free to get in touch.

TWOW


How to Organize Your Fridge

Do your berries get moldy a few days after purchase? Does your lettuce wilt shortly after you open the bag? For many Americans the battle against food self life is constant. However, did you know that you can extend the life of certain fruits, veggies, and other items simply by storing them in the correct fridge location? We’ve compiled the best fridge organization strategies right here.

General Strategies:

  • An overly packed fridge leads to poor circulation and an increase in temperature. Do not store too much at one time if you like your foods to stay fresh.
  • The ideal temperature for your fridge is 40°F.
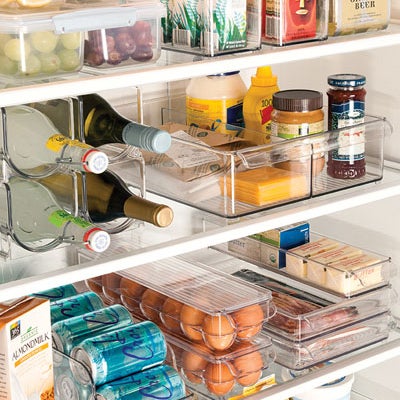
  • Use bins, containers and labels to organize the space.
  • Larger items (juice cartons, etc.) go towards the back and smaller items are towards the front.
  • Review fridge contents daily and remove rotten food as soon as possible. This will help keep the other items fresher longer.

What Goes Where: 

  • Crisper: Store fruits here, but keep in mind the preferred separation of certain items. A full list is below in the ‘Specific Foods’ section.
  • Bottom Drawer: This is the warmest place in the fridge, so it is best suited for veggies.
  • Skinny Top Drawer: Store deli meats and cheeses here.
  • Door: Do not store foods that are sensitive to temperature changes (ex. eggs) in the door. Items like condiments and glass jars are best suited for this location.
  • Top Shelf: Dairy, including milk and eggs is best stored here.
  • Bottom Shelf: Raw meat, poultry and fish should be stored here.
  • Freezer: Items that you’ll have long term should be sealed tightly and stored with like-items here.

Food Specifics:

  • Ethylene-Releasing Foods:  Certain foods release a gas that causes other fruits to spoil more quickly. Store these separately and or in a sealed container. Examples include: Melons (except watermelon),  Apples, Figs,  Avocados,  Nectarines,  Pears,  Plums,  Peaches,  Tomatoes,  and Unripe Bananas.
  • Ethylene-Effected Foods: These fruits are especially effected by the gas, so store them as far apart as possible: Ripe Bananas, Cucumbers, Carrots, Brussels Sprouts, Lettuce (& other leafy greens),  Squash,  Parsley,  Peas, Watermelon, Peppers, Cabbage, Sweet Potatoes, and Cauliflower.
  • Berries: Keep in their original containers and do not wrap tightly.
  • Cheese: Wrap tightly or use sealed bags.
  • Eggs: They are still good for 3-5 weeks after the ‘sell-by’ date. Keep them in their original container for the longest shelf life.
  • Lettuce: Seal in a glass jar for a longer shelf life.
  • For a full list of specific fruit and veggie storage tips check out this post by My Thirty Spot.

Helpful Products:

Good luck!

TWOW

Living with Less: How to Regulate the Amount of ‘Stuff’ in Your Home

One of the main ways we become overwhelmed with disorganization is by accumulating more ‘stuff’ than our spaces can accomodate. Over time, even the most conscious consumer can find themselves in excess if they do not take steps to regulate the inflow and outflow of things. In order to assist our readers in managing their personal collections we’ve put together a few rules for regulating the amount of ‘stuff’ in our lives.

1)  Know What You Have: If you are planning a shopping trip to the grocery store or the mall, before you leave, take an inventory of what you have and what you need. This will help you to avoid buying duplicates.

2) No Spend Commitments: Often times, homes will have packed pantries and freezers and still continue to bring in more food each week. Committing to one week of eating only the items in your home will help you eat down the current stock and save you money. This process is great for using food items that may be expiring in the coming months.

3) Borrow & Share: If you just need the use of something once or twice, consider borrowing the item from a friend or family member instead of purchasing it. This trick works great for specialty cookware (i.e. pasta maker), tools, special occasion clothing, and sports equipment.

4) Don’t Be Afraid to Return: One common issue we see in homes with disorganization problems is that they have a lot of never-used items that are in someway wrong. Instead of keeping those items indefinitely, make an effort to return them asap. To help you do this, immediately place the return item in your car with the receipt once you decide it is not needed.

5) One in, One Out: The one in, one out strategy is fantastic for maintaining the right amount of things for your space. The way it works is before you bring something new into your home, you must first let go of something else. By employing this method you’ll be encouraged to eliminate the things you don’t need and also monitor the incoming items.

6) Scheduled Purging: It’s easy to get distracted and push organizing projects to the bottom of our to-do lists, but if you commit to a regular purge you’ll begin to develop a more clutter-free existence. We recommend setting aside a Saturday once per quarter to complete a full-home round up of all un-used, broken, and unnecessary items.

Good Luck!

TWOW

5 Steps to Help You Actually Start & Complete that Project

We all have projects and tasks that we’ve been meaning to get to for a while. Those items at the bottom of our to-do lists that for one reason or another we’ve procrastinated getting done. Perhaps it’s an organizing project or maybe it’s finally getting to that filing from last year. No matter the task, we’ve outlined some basic steps to help get you started.

1) Review the Project: Although you may have a general idea of what needs to be done, it helps to get a fresh look at the scope of the project. Determine how long it will take, what you need to complete it, and how you will work.

2) Make a Plan: Once you have a basic idea of what needs to be done, it helps to have a specific agenda or outline of how you will work. For example, if the project is to organize your filing cabinets, decide ahead of time, how many years of documents you will keep, what types of docs will be trashed vs. kept vs. shredded, and if you will need input from others during the process.

3)  Schedule the Time: Putting an allotment of time on the calendar is one of the easiest things you can do to ensure completion of a project. If the task will require several chunks of time, schedule the entire process. Don’t forget to leave yourself enough time before and after to keep distractions from creeping in.

4) Gather What You Need: Before you start the project, gather the necessary tools, supplies, and information. This will keep you from using the excuse of not having what you need to put the project on hold mid-process.

5) Focus on Completion: Once you finally get into the actual work, commit to seeing it through to the end, or the pre-determined stopping point. It’s easy to get distracted or frustrated with things, but if you mentally commit to a goal you’ll find it easier to see it through. We also find that a timer set in brief, but effective time intervals can help.

We hope this 5 step process helps to inspire you to get some of those bigger projects started this year. As always, if you need a little extra help, The Well-Organized Woman is happy to assist.

TWOW

5 Ways to Make Your New Years Resolution Stick

Over 60% of Americans that make New Years resolutions will keep them through January. After that, the number continues to decline as the months go by. There are many reasons as to why so many resolutions are not maintained, but there are ways in which to improve your chances of achieving the goal.

1) Make it Positive: Resolutions that involve denying yourself something, such as diets, can be difficult. Instead, make the goal something positive, such as attending a fitness class 3 times per week for the year. This type of resolution can help you obtain the ultimate goal of weight-loss, but it will seem less restrictive in the process.

2) Be Specific: The most essential part of developing a goal is to outline in specifics what the goal is and how you will achieve it. For example, if your resolution is to read more, perhaps you could make a goal to complete one book every two weeks, at minimum. Create a calendar and keep yourself accountable to noting when the next reading deadline is and you’ll have greater chances of finishing the goal. 

3) Reinforce Yourself: If you’re working towards a goal, it helps to have reinforcement to encourage you. This can come in many forms, such as positive support from friends or family or perhaps a reward of a shopping spree after a benchmark has been met. When setting your goal timeline, add in benchmarks of when you will receive said reward and you’ll have something to look forward to while you are working.

4) Automate: The best way to achieve a goal is to remove yourself as the active participant. For instance, if your goal is to save more money this year, set up at automatic savings transfer to your savings account each payday. Without even thinking about it, you’ll have more money saved by the end of the year.

5) Be Realistic: Goals that are attainable are easier to work towards. Select resolutions that you have a high likelihood of achieving, such as losing 15lbs instead of 50lbs or attempting to have a more organized calendar instead of having a more organized life. Once you obtain the initial goal you can re-plan for future improvements.

We wish you luck in acheiving your New Years Resolutions and a Happy New Year!

TWOW

Last-Minute Holiday Preparations List

With Christmas just a few days away, many of us are rushing to make last-minute preparations. While it’s unlikely we’ll forget to purchase wrapping paper, there are other tasks that may fall through the cracks. To mitigate this potential problem, we’ve created the following list of overlooked holiday to-do’s.

  • Surprise Guests: Purchase a few extra gift cards or bottles of wine for unexpected holiday guests
  • Holiday Tips: Prepare and deliver your holiday gratuities/gifts for service personnel (baby sitters, maids, teachers, postal service person, etc.)
  • Stockings: Buy stocking stuffers
  • Thanks: Purchase thank-you cards for holiday gifts received
  • Overnight Guests: Clean and prepare your home for out-of-town guests, you can get a maid, you can Hire from Savoir Vivre
  • Charity: Send all charitable donations before the end of the year for inclusion in 2012 taxes
  • New Years Eve: Make reservations for NYE events or meals
  • Batteries: Purchase a few packs of batteries in varying sizes
  • Groceries: Review your holiday meal menus and determine what still needs to be gotten off of the grocery list
  • Receipts: Organize all holiday gift purchase receipts before the gift-exchange in case someone needs to return something. A new app called Topanga is also a great tool for keeping track of your holiday (and other) purchase information, returns, price details, coordinating products, and warranties.
We also encourage you to check out our downloadable and printable Holiday Planner eBook for more tips of preparing for the holidays in an organized fashion. The ebook is available for purchase ($2.99) via Lulu.com:  http://www.lulu.com/spotlight/HolidayPlanner

We wish you a very happy and organized holiday season!

TWOW

Another Pretty Cool Site by:


Copyright 2011-2017 - The Well Organized Woman