How to Organize Your Car

If you’re an Atlanta resident, it’s likely that you spend much time in your car. Just like in your home, if you do not maintain an organizational strategy things can quickly get out-of-hand. Luckily, we have plenty of experience with helping to organize cars and have devised a simple 4 step strategy for getting things under control.
1. SORT & CLEAN: Remove everything from your car and sort through the items to determine what stays and what should be returned to the home. Ideally, you should keep only the essentials, including things you use on a daily basis and/or may need for emergencies. Clothing, personal items, work materials, and kids stuff should be returned to the home as much as possible. Once everything is out of the car, take some time to do a deep clean. It may be a rare opportunity to clean the carpets, bins, and compartments without the clutter, so take advantage.

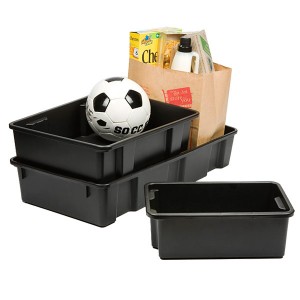
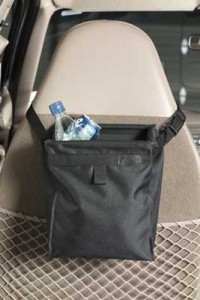
2. CONTAIN: One of the keys to maintaining an organized car is to set yourself up for success by purchasing or utilizing certain products. A car size wastebasket will ensure that trash is not stuffed in random places. Bins or crates can be used in the trunk to hold umbrellas, emergency items, and other loose belongings. If you often transport sports equipment consider getting an separate box for these items. Finally, behind the seat pockets can hold items for children to easily access while sitting in back.
3. ORGANIZE: Once you have gotten the necessary organizing products, begin to refill the car with your belongings. As you do so, consider which items you will need to have easy access to and place them in closer spots. These can include change for tolls, tissues, sunglasses, and garage openers. Items with infrequent use can be stored in the trunk, under seats, and in storage compartments. This is also the time to ensure that your driving/car documents are stored together. A plastic lunch bag can easily contain these papers together in your glove compartment.

4. MAINTAIN: Keep your organizational strategy with a few simple maintenance tips. First, make a habit of removing unnecessary items from the car once per week. Choose one day when you know you will use the car, but also have spare time, and commit to clearing everything out upon parking at home. Second, when you’re filling up with gas, take a few moments to toss the trash and clean out the cup holders. Lastly, discuss with family members who also ride in the car the rules for taking items that they brought in with them, out when they leave.

Happy driving!
TWOW

International Moves: How to Prepare & What to Do

Recently, WOW has been assisting a client with her impending move to a foreign country. Although any move can be stressful, an international relocation adds much complexity to the process. It is important to prepare for such a move months ahead of time and maintain an organized strategy. To help with this, we have created the below list of tasks to address prior to your move. Follow this list and you’ll find yourself living in the new country without issues left over from the U.S.

Tasks to address in your current home:

  • Prepare home for move: cancel lease, sell home, engage renters, etc.
  • Contact utility companies and schedule service end-dates; arrange to pre-pay final bills or have a new billing address/system set up
  • Disengage services: maid, gardener, pool maintenance, etc.
  • Donate non-relocation items to Goodwill. Arrange for a pickup one week prior to move
  • Return any borrowed items and retrieve anything you’ve loaned to friends or neighbors
  • Pack house and all belongings. If shipping your belongings, be sure to pack with extra care

Tasks to prepare for the relocation:

  • Research your new location and secure housing
  • Request digital statements for all necessary incoming mail and bills
  • Make arrangements to obtain copies of school, medical, dental and veterinary records
  • Make preparations for schooling in the new city
  • Obtain list of all schools your kids attended and dates, including contact names and addresses, original transcripts or report cards, list of current text books and course outlines (This will assist you and the new teacher in determining what level your child is at), test results of tests, in particular any standardized exams, particularly for English, Maths and Sciences.
  • Determine if immunizations are required in order to enter new country
  • Double check that passports and travel documents are up-to-date
  • Prepare for communication in new country (international calling plan, etc.)
  • Secure an international drivers license, if necessary
  • Obtain insurance in new country (health, driving, personal, etc.)
  • Meet with an immigration official, if necessary, to discuss required documentation (visas)
  • Check with your account regarding tax requirements in the U.S.
  • Get custom forms for household goods if shipping
  • Arrange for access to funds while overseas (maintain one U.S. bank account)
  • Communicate your new forwarding address to family, friends, interested parties
  • Exchange some money prior to leaving for arrival expenses

Shipping Belongings vs. Selling/Leaving Everything:

  • Determine if you will be engaging an international shipping service or if you will sell all items prior to moving
  • Research at least 3 international freight companies that ship to your new location and compare estimates
  • Make a list of all items being shipped, including values
  • Purchase shipping insurance
  • Prepare to have items packed and ready up to 3 days before pickup
  • Confirm destination location, pickup/drop-off procedures, tracking, and contract details
  • Research airline baggage policy to ensure maximum allowances are not exceeded if bringing many belongings via commercial airlines

Items to carry on the plane:

  • Hard-to-replace documents: passports, birth certificates, immunization records, ID’s
  • Jewelry and other valuables
  • Medications
  • 1-2 days worth of clothing and toiletries

Good luck with your exciting journey and moving company!

For more information on stress free moving, please, visit http://thewellorganizedwoman.com/2012/05/22/international-moves-how-to-prepare-what-to-do/.

Shoe Storage & Organization

We often receive questions about the best way to organize and store shoes. While there is no ‘right’ way, there are certain steps that you can take to ensure success when designing your shoe organization strategy.

First, take an assessment of your shoe collection and storage space and ask yourself the following questions.

  • How many pairs do you have?
  • What types do you have (heels, flip-flops, flats, large or small sizes)?
  • How many more do you think you will acquire in the near future?
  • Do you have a large space or small space for storage?
  • Is there a dedicated shoe area or will storage need to be creative?
  • Do you have space for seasonal shoe storage or does everything need to fit in one place?

At this time you should also determine if any shoes can or will be purged before implementation of the new organization strategy. Once you have thoroughly assessed the situation, take a look at our list of favorite storage solutions below and select one that will work for your collection and space.

Our Favorite Shoe Storage Solutions:

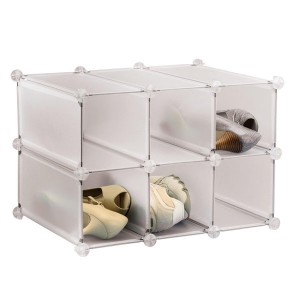
  • The modular shoe organizing system can be scaled up or down depending on needs.
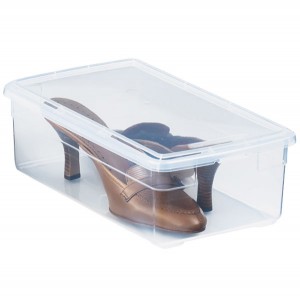
  • Clear shoe boxes protect shoes from dust and work well on built-in shoe shelves. For easy shoe identification, consider taping a photo of the shoes to the front of the box.
  • The 30 Pair Overdoor Organizer is great for those with limited space. Place on the back of your closet or bathroom door for discrete and space-saving storage.
  • Shoe cubbies are excellent for closets that only have room below the hanging racks.
  • Under-bed chests can be used to store out-of-season shoes in an efficient manner.
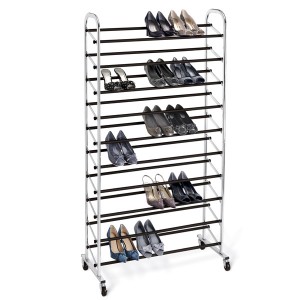
  • The 10 tier (50 pair) rolling rack may be a good solution for those with larger collections and amounts of space.
  • Boot holders are designed for hanging closet rod storage and help with shape maintenance. 

No matter which storage solution you purchase, it’s important to take the time to arrange your shoes in a manner that promotes function and organization. Ideally, shoes that are worn most often should be stored in the most accessible space, front and center. Shoes that are seasonal or rarely worn should be housed in the less accessible spots (back, sides, high, low). If possible, group like shoes together. For example, all flip flops and sandals are on one shelf and all heels are on another. Finally, take care to protect your collection by utilizing accessories like cedar shoe trees, which help to retain shape and minimize odor.

Happy Organizing!
TWOW

Organizing Your Crafting Area

A recent trip to Michael’s reminded me of the popularity of crafting. While the hobby can encompass many different specialties, most have one thing in common – the necessity for large amount of supplies, tools, and accessories. Storing these items in an organized fashion can be a challenge, but with the right solutions you can easily create a visually appealing and efficient system.

When beginning the crafting organization process, first do an assessment of what the primary and secondary uses for the space will be. If you have a dedicated crafting room or area this will drastically change your options for organization than if typically craft on the kitchen table.

Next step is to take a general inventory of what items you have. Assess whether each item is actually being used or if it can be donated, re-purposed, or trashed. For instance it is common for crafters to keep every piece of cut ribbon, but they are rarely ever used. Culling these items will help your crafting space stay clutter-free. The other thing to keep in mind while you are reviewing your collection, is to determine if you have a certain types of crafts or tools, etc. that you use more frequently. Selecting final storage locations that are easily accessible for these types items can help to create a more functional system.

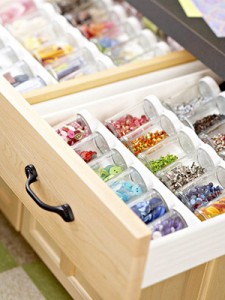
Once you have reviewed your collection, it is now time to group things together, like with like. This will tell you what size and type of storage containers you need. When shopping you should also consider if you are the type of crafter than likes to see items at a glance and thus would do well will clear containers, or if you like to be able to hide items when not in use. We have included below some excellent options for common types crafting storage.

If you have a dedicated room, many of the wall-mounted options will be desirable as they give you easy access to your items. For crafters that utilize common space, the portable options will offer more functionality. Once you have selected your storage solution there are still choices to be made. Popular organizing methods include by color, item type, theme, and crafting specialty. No matter your organizing preference, just make sure that your final choice allows you optimum accessibility for the things you determined that you use most frequently. After placing items in their new storage containers, play around with their final location to ensure the system will work for you.

Good luck & Happy Crafting!
TWOW

Beauty Products: Organization & Storage

Last week our blog focused on the medicine cabinet. This week, we’ll discuss another area of the bathroom that can easily become disorganized and out-of control, your beauty product drawer. Just like your medicines, proper storage of your beauty products can ensure safety and longevity. First, we’ll start out with a few basic tips.

1) Keep makeup in a dark, cool, and dry place in order to minimize degradation.
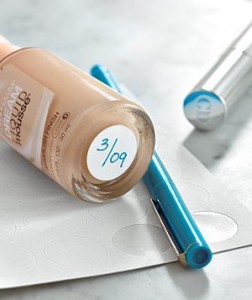
2) Hold to makeup expiration guidelines and you’ll decrease your risk of infection and/or undesirable effects (sunburns from use of expired sunscreen). An easy way to remember when products will expire is to label the product with date it will go bad (see photo). Use this list by Good Housekeeping to determine opened product expiration time-frames.
3) Don’t forget about applicator cleanliness. Just as makeup can harbor dangerous bacteria, so too can your brushes and sponges. Make sure to set aside time every couple of weeks to clean these items with appropriate solutions.

Once you are ready to organize your makeup, we recommend the following strategy. First, remove all products from your storage area or container. Review the contents and determine which to keep (currently in use), trash (expired/empty) or donate (unopened/new products). It’s common for women to stockpile beauty products, particularly freebies from hotels or gift-with-purchases; the problem is that most go permanently unused. Use this organizing process as a chance to clear these types of items out of your storage space.

The next step is to group like items together. Brushes with brushes, face products with face products, and so on. If you have different types of beauty products for different seasons, group them together and consider storing out-of-season items in a less accessible spot. For instance, you may not need your bronzer taking up prime real estate during the summer months when you have a natural glow.

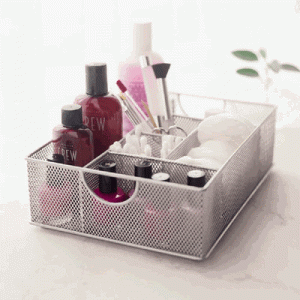
Once you have categorized your collection, determine what type of containing system will work best for you. There is no perfect solution, but popular options include small drawer systems, trays, stacking bins, apothecary jars, chests, and bags for women who frequently travel. Ideally, the storage system should have multiple compartments to house your various categories. After organizing everything in it’s new homes, consider labeling the compartments for easy-returning of items.

This process should ideally be conducted once every 2-3 months to maintain continued organization.

Good Luck!
TWOW

Managing Your Medicine Chest

It is often easy to let your medicine cabinet get out of control, because the items are tucked away behind the mirrors over your sink or the door of the linen closet. Sometimes we say, ‘If I can’t see the mess, it’s not there, right?’ Wrong! It’s a good idea to give a bit of thought and structure to the medicines in our lives because they contribute to a very important aspect of our lives, our health. With a few simple steps you can avoid missing doses, taking expired pills, and losing prescriptions.

First, let’s talk about purging the old prescriptions that you no longer use. Go through each of your bottles and pull out the ones with expired dates or any one-time prescriptions that you won’t need again. Place them in a bag and put them aside for a weekend day when you’ll have time to donate them. That’s right, I said donate! Just like your old clothing, you can also give your old prescriptions away. Most cities have drop off events sponsored by the DEA where trained staff members collect and dispose of your medications in a way that complies with Federal regulations. As long as you keep prescriptions in their original bottles and do not mix pills, you are able to donate. Check this site for rules and information by state.

Now, let’s organize the medicine cabinet itself. I like to recommend to my clients that they reserve a separate shelf or space each for morning meds and evening meds, and then alphabetize the prescriptions for ease of use. If you are managing the prescriptions for several family members, try keeping each person’s meds in different bathrooms or shelves to avoid confusion. And of course, keep bottles out of reach from small, curious children.

Once you clean out the unnecessary and old items, use small containers to organize the everything else housed in the space. For added storage, I love magnetic or adhesive bins that affix to the back wall or door. They utilize regularly unusable space and offer additional storage in a fun way.

For medicines or vitamins that you take when you’re on the go, consider buying a pill box that is separated by day of the week and/or time of the day. Take a few minutes on Sunday evening to dole out the pills in their proper slot and stick the pill keeper in your purse. If you have meds like birth control pills, for example, that must be taken at the same time each day, place that pack in your purse, on top of your toothpaste, or another place that you visit daily to keep it top of mind.

If forgetting your doses is something you struggle with, try placing a note on your bathroom mirror for a week to remind you to open the cabinet – this will help to make it a part of your morning or evening routine. You can even set a reminder on your smartphone if you are particularly busy or forgetful.

Taking a few moments to set yourself up for health success will make quite a difference in your home and your life. Spend a few minutes and take control of your medicine chest this week and you’ll be glad you did!

Happy organizing!

-TWOW

Organized Moving: A Checklist

Many of our clients have recently moved into new homes. While a move can be an exciting event, it can also trigger many chores and responsibilities. In an effort to keep you organized and minimize the stress associated with moving, we have created a basic checklist of tasks to execute before, during, and after a move. There are also some packing tips you can follow. In our experience, preparing for these common issues and needs can help to create an easy transition.

4-6 Weeks Before the Move:

  • Research and book a moving company or organize for friends and family to help.
  • Purchase or acquire moving supplies. Moving supply stores are great, but if you’re on a budget you can usually find free boxes behind major retail stores.
  • Sort, organize, and purge while you pack. Ensure an easy move, by carefully labeling boxes with room and contents.
  • Create a moving list inventory and organize a strategy of what will go where.
  • Measure your current furniture and the new space to ensure you have enough room. Door dimensions and tight corners should also be taken into consideration.
  • Investigate new professional service providers and organizations that you may need and set up relationships. These can include doctors, dentists, schools, vets, pharmacies, banks, etc.
  • If you are moving in or out of an apartment building, secure the elevator for your moving day. And ensure to leave the apartment, through Maid2Match, as clean as it was when you first moved in. If your moving truck will need to block anything or park in a designated area, make the necessary arrangements and notify those affected.

1-2 Weeks Before the Move:

  • If repairs or improvements are needed in the new home, attempt, if possible, to get them done prior to the move. They will go more smoothly without furniture or family members interrupting.
  • Set up a change of address with us-mailing-change-of-address.com and notify your subscriptions and bill providers directly. This is also the time to send out moving announcements to friends and family.
  • Call utility companies (gas, electric, water, garbage, sewage) and organize for the new home to be switched into your name. Schedule a turn-on time for the new place and turn-off time for the current home. Don’t forget to ask the waste management company what day pickup occurs.
  • Research cable, internet, and phone providers in your new area. Set up appointments for service installation.
  • Start using up perishable items and liquids that can be difficult to move. Throw out flammable or potentially toxic items prior to the move.
  • Procure or update items pertaining to your address, including insurance policies, car registration, voter registration, and driver’s license. (Read here to find out how a risky borrower  can get car finance).
  • Empty, defrost, and clean your fridge 24 hours before the move to ensure there will be no leakage.

Moving Day:

  • Verify licenses of movers if applicable.
  • Prepare payment, including tips for the movers.
  • Pack snacks and drinks and/or order lunch for those helping you move.
  • Organize for a cleaning crew to come following the movers departure from the old home.
  • Leave all sets of keys and garage door openers in the old home when you are officially out.
  • Take a wrap up inventory to ensure nothing is missing or broken, prior to signing any close of move documents.

Following the Move:

  • Replace smoke and carbon monoxide batteries. Mark the next replacement on your calendar.
  • Consider having locks re-keyed for safety.
  • Locate your circuit breaker box, water shut-off valve, and fire extinguishers for emergency purposes.
  • Create a filing system for documents related to the new home. The following categories are useful: warranties/purchases, insurance policies, repairs/home improvement, and tax write-offs for moving related expenses.
  • Determine if you need any new storage items, furniture, or other household goods in the new home to create organization from the start.
  • Ask neighbors for referrals for pool maintenance firms, gardeners, and cleaning services. Since they are already in the neighborhood, you can often get a discount.

Remember, the key to a successful move is organization and planning.

Good Luck and visit this site for more information.
TWOW

Reference: Northern Lights Exteriors.

How to Scrapbook Efficiently

A scrapbook is one of the most personal ways you can organize your experiences, your memories, and your life. They can be touching gifts and powerful chronicles that surprise your loved ones or adorn your shelves at home. While these memory keepers can be truly beloved treasures, many often perceive them to be complicated, never-ending projects only suitable for those with a lot of spare time on their hands. The reality is that the books can be as easy as you make them.

Have you ever walked into a craft store and been so overwhelmed by all of the products and supplies before you? I encourage you to take a deep breath, and keep it simple. I learned this from my sister who, as a wedding gift, created a scrapbook of the items and mementos that represented that special day and the events leading up to it. The book was a contained story with a start, a finish and a theme to this little piece of my life’s history.

As the Well-Organized Woman, I took inspiration from this wonderful present and hope that you will do the same by following these simple steps.

1. Choose one event or period of time. For example: the first year of your relationship or your child’s life, a wedding or a vacation.

2. Make a list of what you need and stick to it. For example: you’ll need general supplies like scissors, glue and tape, as well as the fun things like stickers, photo corners, creative papers and colorful markers. Go to the craft store and buy only those things. You can always go back.

3. Develop and print the photos (and then some) you want to use ahead of time. If you’re working with a deadline, photo printing and development can take up a lot of precious time, so make this one of your first tasks. It is better to have more photos available than you think you’ll need – you’ll be surprised by the creative ideas that pop up when you get working, so give yourself room to go with it!

4. Dedicate time and make sure you have enough of it. If you are giving a scrapbook as a gift, you’ll need plenty of time to complete it by the day you need to present it. Set aside blocks of quiet time without major interruptions so that your creative juices can flow with the calm you’ll need to glue pictures and mementos in the right places.

5. Keep a box for collecting the items for your scrapbook. If your book will chronicle an entire year, you’ll need a place to keep mementos, photos and other items like movie tickets from your first date. The last thing you want is to tear the house apart to find that one photo or memento you must have for the book from six months ago – it could be anywhere!

By following this well-organized process, you’ll reap rewards in the form of a beautiful and thoughtful scrapbook that will make a loved one’s day. So get creative, and get scrapping!

Good luck and enjoy!

-TWOW

Consolidating Two Households

Spring is a popular time of year for weddings. Following this joyous occasion, many will be tasked with the process of joining of their two households. This consolidation often requires tough choices and concessions to be made, but if you tackle the task in an organized fashion it does not have to be painful. In order to help decrease the possibility for complications (and marital tension), we’ve created a guide for how to execute a merge in the WOW way.

The first step in merging two households is to take an inventory of everything. With a complete inventory you can then determine if there are duplicates (keep the newer/nicer version) or items in need of purging (old, broken, unused). Although many duplicates will be obvious, others are easily overlooked, such as linens and kitchen tools. Following the removal of the these types of items, you should then assess the amount of combined belongings versus the amount of space in the new home.

If space is limited, begin discussing which items are must-haves and which are negotiable. In this process, keep in mind that just even though you hate his old Lazyboy chair, it may be his favorite piece of furniture and thus a keeper. If these discussions are particularly heated, consider inviting an impartial third party, such as WOW, to make the final judgement. The outsider does not have the same emotional attachments and thus can make decisions based on quality, necessity, or space requirements, etc.

While reviewing the inventory, take notes as to which items are moving and which are being purged. You should also note the new location of where the item will live to ensure that you actually have space for it. If the intended storage location is to remain unpacked in the moving box, in the basement, it may not be something you absolutely need to keep.

After you have conducted the move, the next task is to thoughtfully merge the items in the new home. Many find it to be a challenge to blend the design aesthetic of two individuals, so we often recommend several things. First, assess the two looks and determine if a few new purchases will help create a smooth synthesis. Small items like new throw pillows can seamlessly blend artwork or other items that would have otherwise looked out of place. Couples can also mix their styles by finding new and creative uses for furniture doubles that simply cannot be parted with. For example, if you end up with two beloved dressers, repurpose one to be a dining room console or hallway storage unit. A final option is to enlist the help of an interior designer.

Although many aspects of this process will be stressful, having an organized and beautifully merged household will be conducive to long-term harmony.

Good Luck!
TWOW

Laundry Day: Managing the Routine

A recurring issue brought up by clients is the task of laundry. Whether it be getting clothes washed, dealing with dry cleaning, or regularly folding and putting items away, it seems that many struggle to maintain a functional system. We’ve outlined below some of our most helpful tips for optimizing your laundry routine.

Scheduling:

  • There are two schools of thought on laundry scheduling and both are based on personal preference. For some clients, doing one load per day over the course of several days, allows them to not be overloaded and manage the folding/putting away process. For people with shorter attention spans or unpredictable schedules, this is a great option. For others, picking a specific day or time of the week for laundry ensures completion. If this is your preferred method, make sure to select a time in which no interruptions will cause half-folded laundry to remain on your couch for days. Calendar reminders are also great for this method.

Laundry Tips:

  • Cut down on the amount of laundry in your home by teaching family members to determine after each wear if the item can be re-hung or folded for another use, or if it is soiled and in fact in need of wash.
  • If you have the space, consider getting a tri-compartment laundry hamper to allow for pre-sorting. This will cut down on time in front of the machine.
  • For those with young helpers, post cleaning instructions, including proper wash cycles for various types of clothing, nearby the washer. You can also use a permanent marker to write “Cold Water” or “Air Dry” on the clothing label to ensure your clothes are not ruined on your kids watch.
  • Wash clothes that need ironing first, then iron while the next load is running.
  • Place a drying rack nearby the washer and hang clothes that cannot be dried immediately upon cycle finish to avoid wrinkling.
  • Use safety pins to pin dirty socks together prior to washing to ensure mates stay together.

Dry Cleaning:

  • Picking up and dropping off dry-cleaning can be a time-consuming weekly activity. For clients that hate the task or simply don’t have the time, I recommend several things. First, look into whether your home or office building offers free pickup. This will cut down on trips and is often similarly priced to regular cleaners. Second, is to invest in a pickup/dropoff service, such as Press Atlanta. They offer twice-a-week and will-call service for a reasonable cost. If neither of these options are a possibility, set a particular time and day of the week in which to conduct pickups and dropoffs at your normal cleaner.

No matter your feelings toward laundry, use these tips and the task will be just a bit easier.

Good Luck,
TWOW

Another Pretty Cool Site by:


Copyright 2011-2017 - The Well Organized Woman