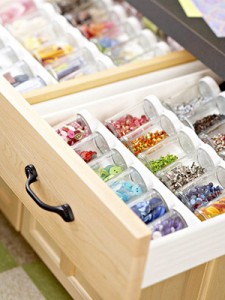
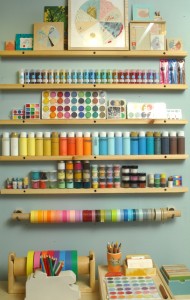
 A recent trip to Michael’s reminded me of the popularity of crafting. While the hobby can encompass many different specialties, most have one thing in common – the necessity for large amount of supplies, tools, and accessories. Storing these items in an organized fashion can be a challenge, but with the right solutions you can easily create a visually appealing and efficient system.
When beginning the crafting organization process, first do an assessment of what the primary and secondary uses for the space will be. If you have a dedicated crafting room or area this will drastically change your options for organization than if typically craft on the kitchen table.
Next step is to take a general inventory of what items you have. Assess whether each item is actually being used or if it can be donated, re-purposed, or trashed. For instance it is common for crafters to keep every piece of cut ribbon, but they are rarely ever used. Culling these items will help your crafting space stay clutter-free. The other thing to keep in mind while you are reviewing your collection, is to determine if you have a certain types of crafts or tools, etc. that you use more frequently. Selecting final storage locations that are easily accessible for these types items can help to create a more functional system.
 Once you have reviewed your collection, it is now time to group things together, like with like. This will tell you what size and type of storage containers you need. When shopping you should also consider if you are the type of crafter than likes to see items at a glance and thus would do well will clear containers, or if you like to be able to hide items when not in use. We have included below some excellent options for common types crafting storage.
- Embellishments: parts storage bin units, clear jars, lazy susans & spice racks if using original containers, magnetic containers, interlocking storage cups
- Pens, Scissors, tools: mesh desk cups, wall-mounted bins, modular storage cubes,
- Scrapbooking Paper: Desktop bins, movable divided holders, wall-mounted magazine racks, filing cabinets with folders organized by the rainbow
- Ribbons: paper towel holder, wall-mounted two dowel rack, stacking dispensers
- Crafting Storage Systems: wall-mounted peg board system, shoe cubbies
- Portable Crafting Storage: multi-drawer cart on wheels, locking portable art bin, gardening bag
If you have a dedicated room, many of the wall-mounted options will be desirable as they give you easy access to your items. For crafters that utilize common space, the portable options will offer more functionality. Once you have selected your storage solution there are still choices to be made. Popular organizing methods include by color, item type, theme, and crafting specialty. No matter your organizing preference, just make sure that your final choice allows you optimum accessibility for the things you determined that you use most frequently. After placing items in their new storage containers, play around with their final location to ensure the system will work for you.
Good luck & Happy Crafting!
TWOW


